This dashboard has been developed to help in the starting tomoscan scanning process by allowing the user to monitor and control everything associated with tomoscan.
To access the BEATS Dashboard, type the following command:
The user has the option to choose the detector after opening the main window. Once the user has selected a detector, the Current Chosen Detector will display their selection.
Following that, the user has the option to choose the scanning technique. Once the user has selected a scanning method (started the Tomoscan IOC), the detector type and scanning technique will display their choice. Additionally, as shown below, the other types of detectors will be disabled and the other scanning techniques hidden.
Figure 3: Selecting Process of Scanning Technique
To change the detector type or scanning technique, the current process (TomoScan) must be stopped.
Note
All operations will be opened in tmux sessions, to attach any session, write the following commands:
$ tmux ls
$ tmux a -t "session name"
$ Esc, Ctrl b, d (to detach the session)
Warning
Make sure the TCPServerSocket.py is running on the server.
Warning
There is an interlocking between (Start, Stop, Restart) for all operations, depending on the status of the IOCs, whether they are running or not.
Warning
If one of the common IOCs is stopped (except SSCAN IOC), the other controlling sections will be disabled until all the common IOCs are running.
Warning
If the combined stopper shutter has a fault or the PSS is interlocked, the DAQ Tomoscan will be available only in Testing Mode.
Note
In the scanning techniques section, the python server (start button) is disabled until the tomoscan IOC is started.
Warning
There is an interlocking between the scanning techniques. This means that if any other scanning is started while the first one is still running, the first scanning will be automatically halted.
Warning
If the detector’s IOC is stopped and you select any detector type, you cannot start the scan until the IOC is running.
Note
If the GUI is unexpectedly closed and then reopened, selecting one of the detectors will show the current choice if one of the other sections is hidden or disabled.
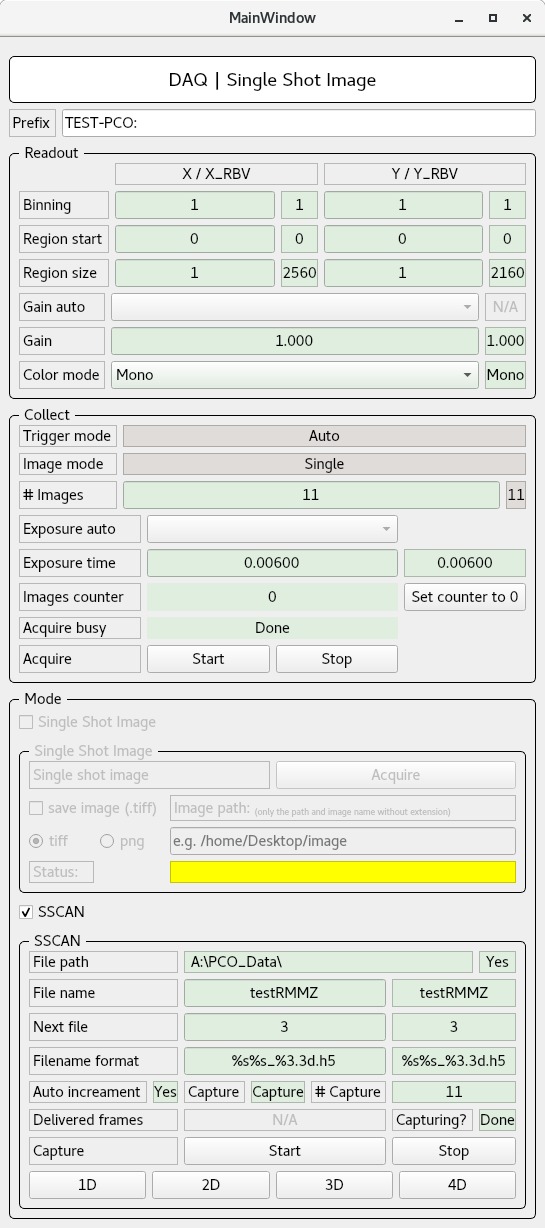
The fundamental idea behind a single shot image is to capture one or more frames based on the capturing type chosen.
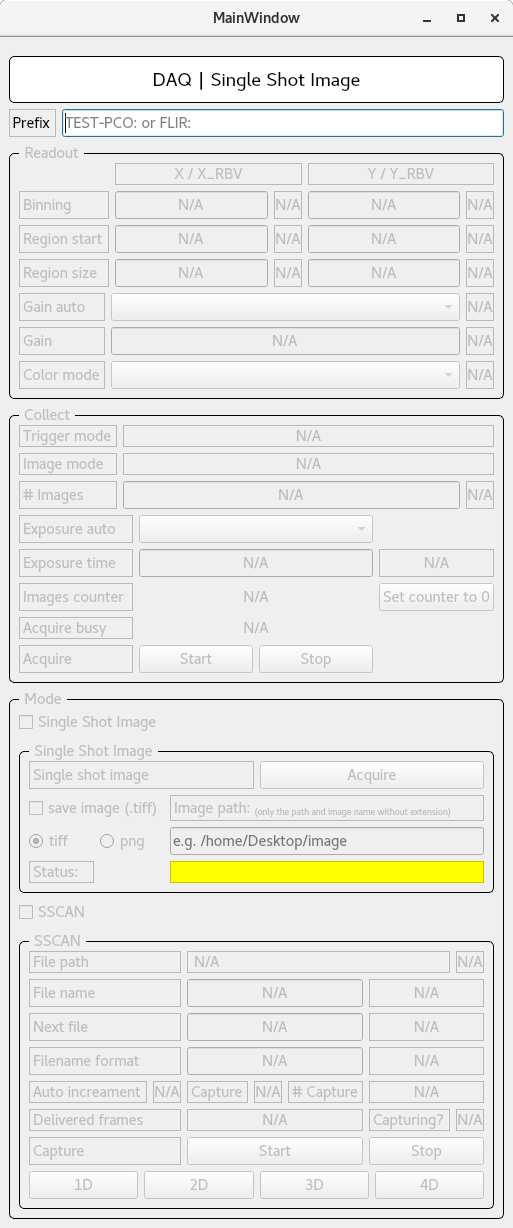
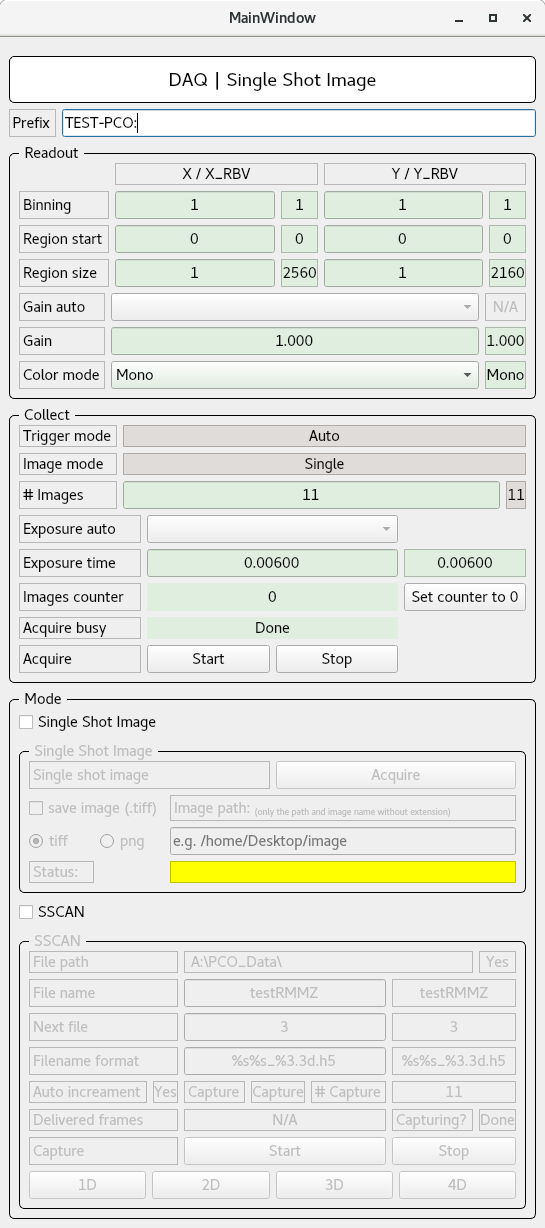
To begin this process, once opened, its features will be disabled as shown in the figure.4, and you must type the detector’s prefix (TEST-PCO: or FLIR:) to be able to proceed as shown in the figure.5.
Note
The Single Shot Image main window button will be disabled if any tomoscan mode is running.
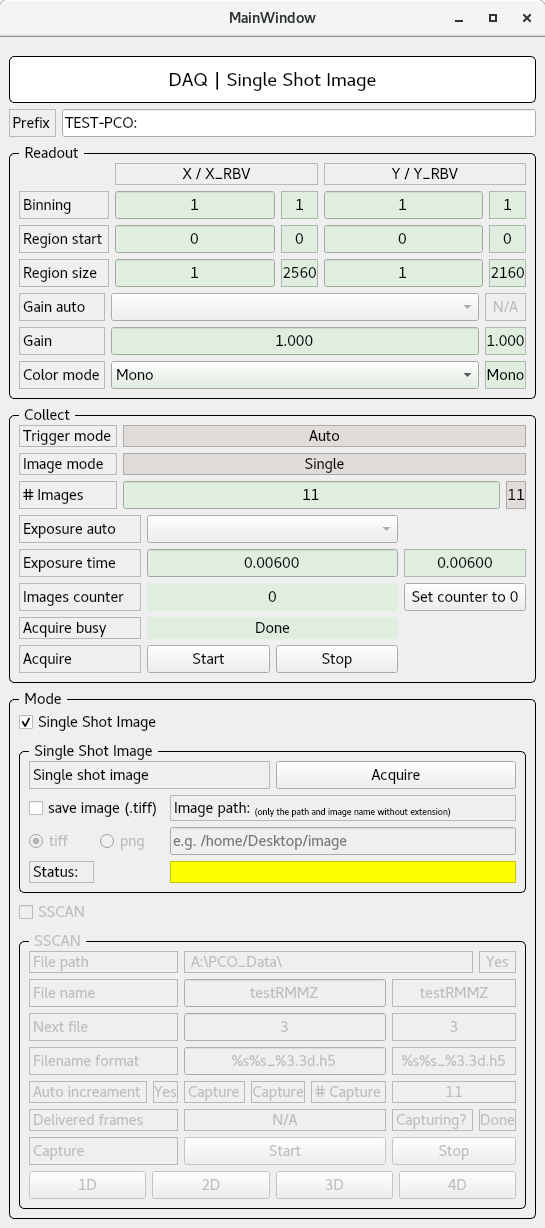
To save the image, you have to determine the path and define the image name only without any extension. Moreover you will be alerted if the path is not valid.
Note
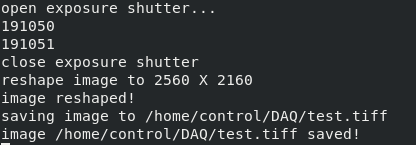
The acquiring process is shown in the main terminal as figure below. Moreover, the Status yellow field shows the last log.
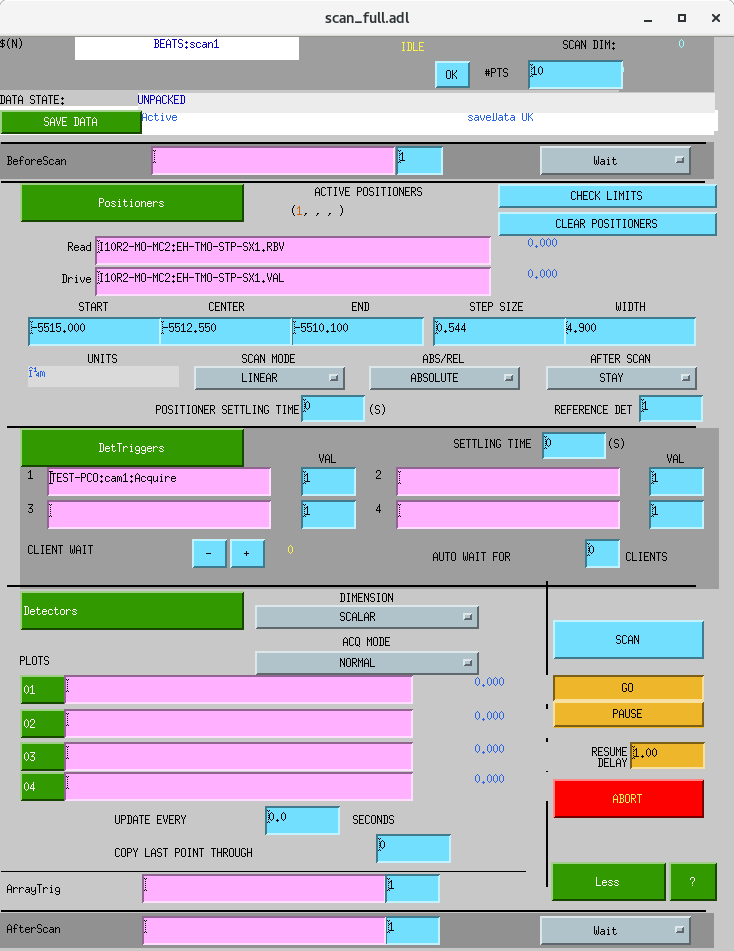
The trigger PVs to start acquiring for both detectors are:
- for PCO: TEST-PCO:cam1:Acquire
- for FLIR: FLIR:cam1:Acquire
Note
Very Important!
You must ensure that the data from the detector are gathered; the value for the Capturing? field should be (Capture yellow Colored instead of Done).
Note
The file extension of SSCAN outout is binary format (.mda), to read it you have to convert it to txt file.