Set up your experiment
Warning
Collision danger: Only perform this operation together with the beamline staff. You must always pay attention to the position of endstation, detectors and sample, while performing the alignment. Always move small steps when endstation and detector are close to each other!
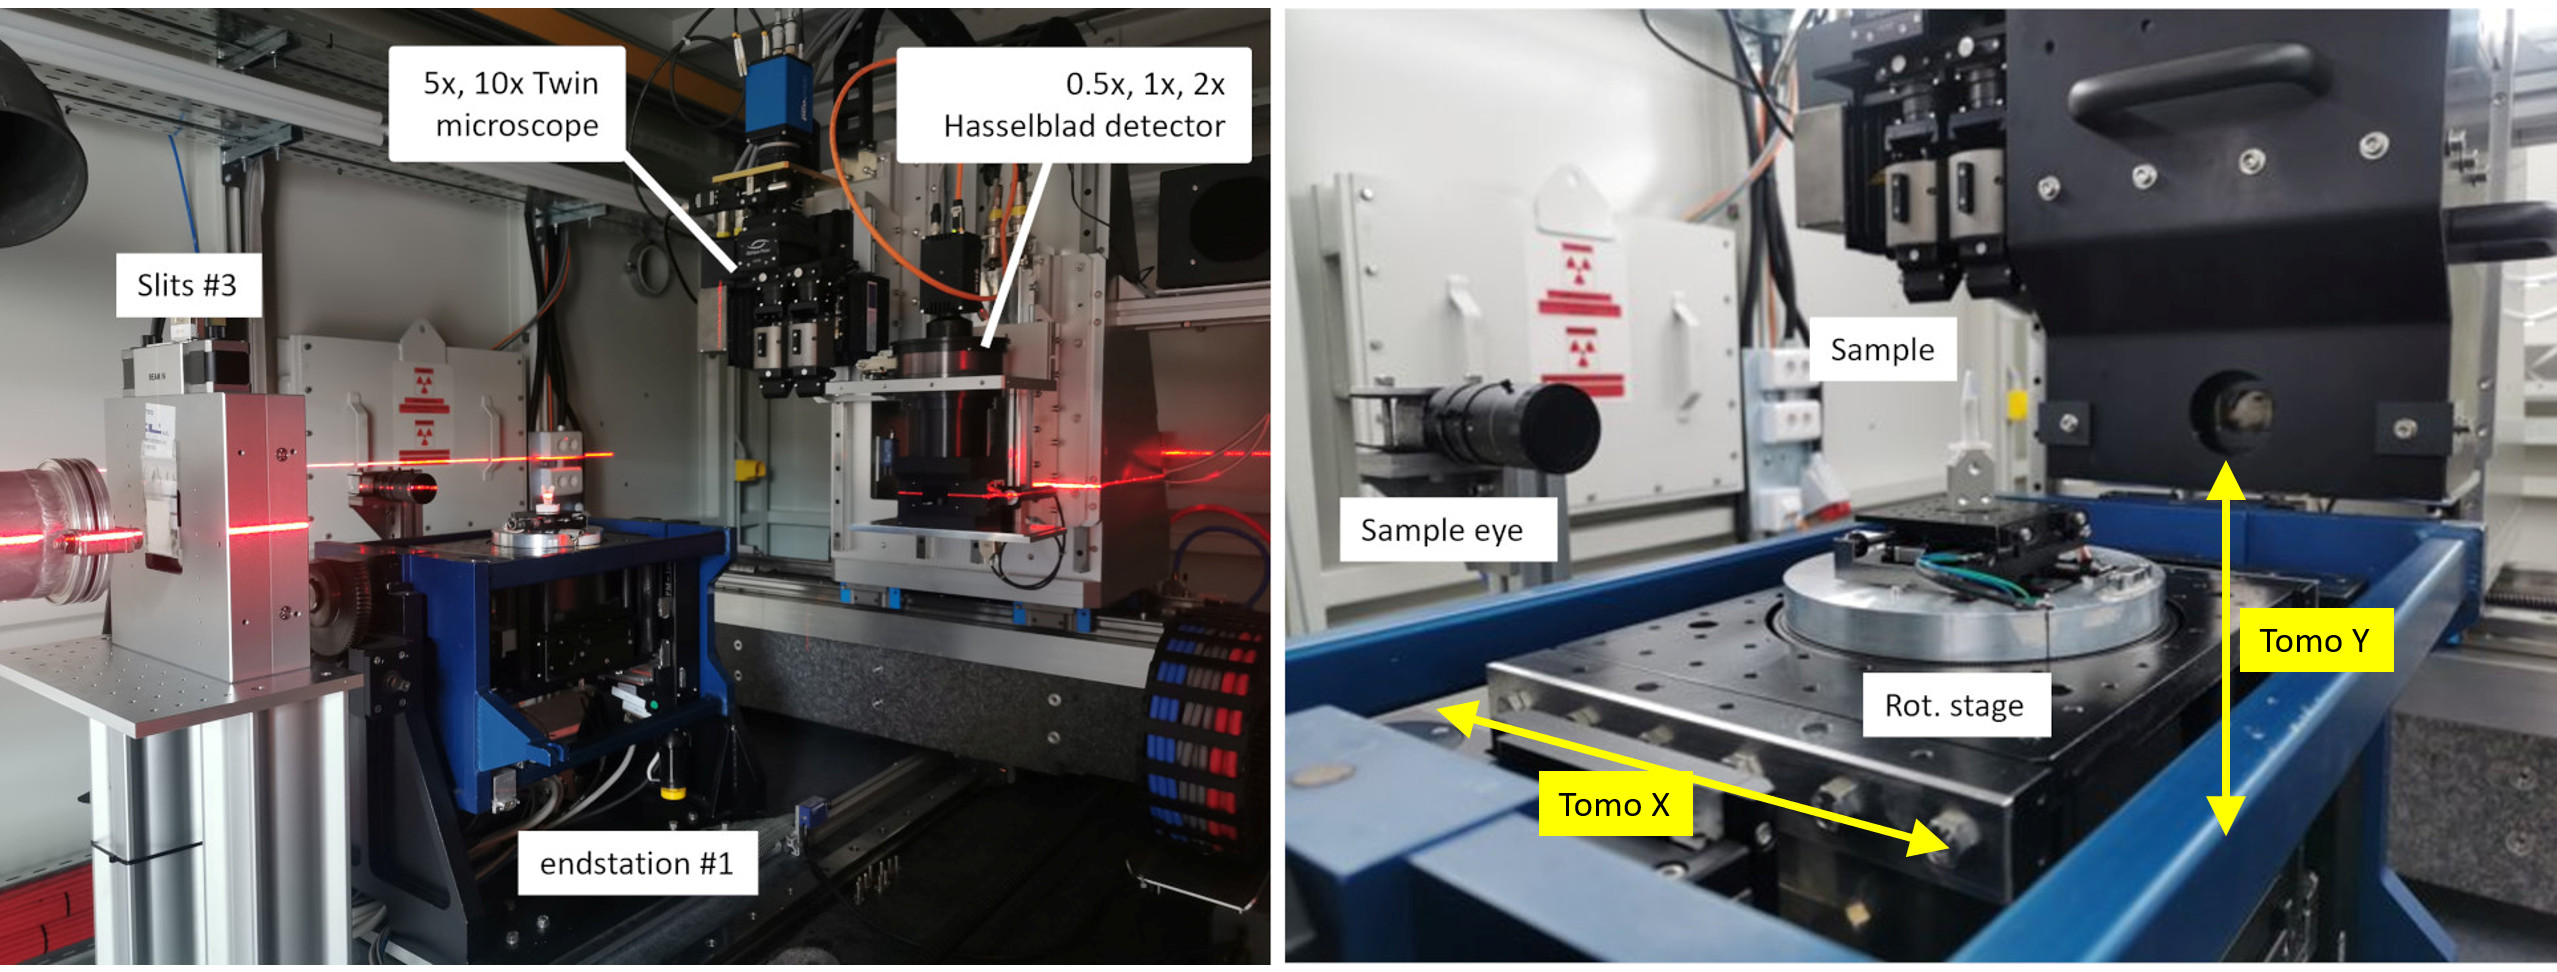
Figure 1: BEATS experimental station. Two laser lines are used to pre-align sample and detector on the beam.
Preliminary steps
Mount your sample on top of the tomography endstation (Figure 1 RIGHT)
Turn on the alignment lasers
Use the laptop close to the endstation to:
Pre-align sample on the intersection of the laser planes (you can verify this also moving the ROT stage)
Pre-align the detector scintillator on the same line
Set the distance between sample and detector to the desired value
Sample mount
Samples can be mounted on the tomography rotation stage with M4 screws as shown Figure 2.
A set of standard kinematic mounts from Newport is also available: M-BK-1A (download -> drawing).

Figure 2: (LEFT) Detail of sample tomography stage. (RIGHT) The sample plate has 9 M4 holes that can be used for custom sample support.
Sample alignment
Sample alignment procedure
Load the sample on the kinematic mount (for automatic alignemt of the endstation with Tomoalign use the tungsten wire available at the beamline as sample) then:
Perform the hutch_search
Open the shutters using the vacuum
Use the Experimental GUI to move the sample up/down until the sample is in the field of view of detector.
Experimental GUI

Figure 3: BEATS experimental GUI.